
Use the System Test app to test in-vehicle batteries using test parameters determined by the vehicle VIN. A System Test for Starter and Charging system testing is also available.
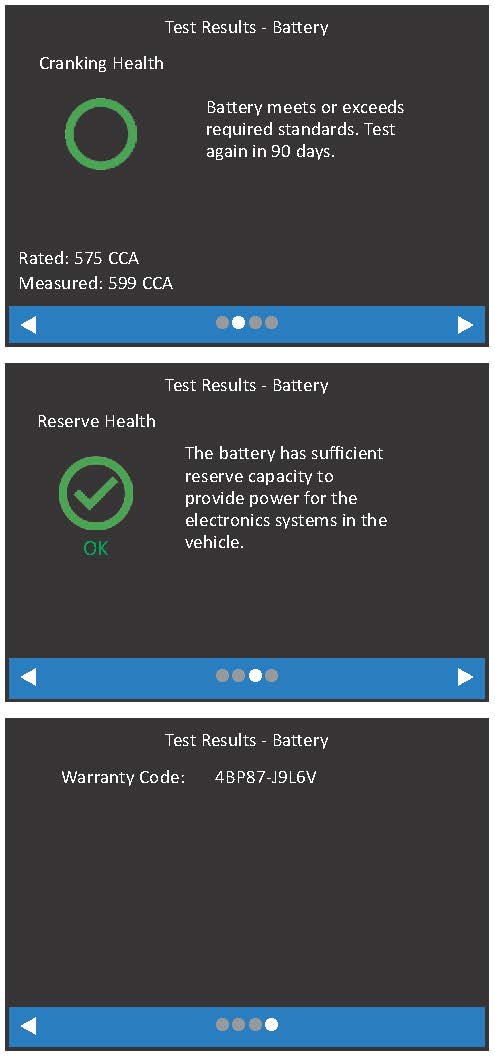
The tester renders a battery decision, along with additional detailed information on battery cranking, reserve capacity, and a warranty code.
Press
![]()
to return to the previous screen, select options, and when necessary, press
![]()
to enter or continue to the next step.
NOTE: The testing process uses Conductance Profiling technology to determine battery cranking ability and Reserve Capacity. This additional analysis can take up to 60 seconds to complete.
1. Connect the tester clamps to the battery terminals.
To expedite the testing procedure, Auto Test is enabled and the tool immediately begins testing the battery as soon as the clamps are connected. See ‘Settings’ for information on disabling/enabling this feature.
2. At the Main Menu, select Battery Test.
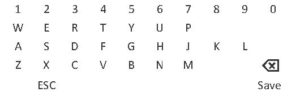
3. Enter Work Order: If enabled, use the displayed keyboard template to enter Work Order information (See ‘Settings’ for information on enabling/disabling this feature).
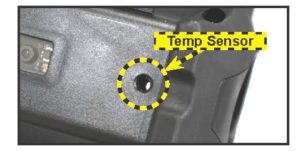
4. Temperature: Hold the tester temperature sensor 6 to 12 inches over the top of the battery besting tested. Select Capture to lock ini the live temperature reading.
5. VIN Capture: Scan the VIN bar code, usually located in the right corner of the vehicle’s front windshield or on the driver’s side door frame. See the Scanning Tips article for additional information.
Manual Entry – Use the on-screen keypad to manually type the 17-digit VIN (the displayed digits counter will count up the alphanumeric characters as they are entered) and select Next.
6. Vehicle Info: The vehicle information for the associated VIN is displayed. Select Next.
7. Select Battery Brand: If the VIN entered is a Mitsubishi vehicle, select the Battery Brand and press ![]()
8. Battery Test Setup: Enter the displayed battery information:

NOTE: If Group 31 application is selected, the user will be asked to enter the battery’s AH rating.
9. Select Next to continue with the System Test.
10. Start the vehicle’s engine and let it idle.
11. Ensure all accessories (high beam headlights, ventilation blower, etc.) are off and select Next. The alternator output is tested.
12. When prompted, rev and hold the engine to between 2000 to 3000 rpm. The alternator output is tested.
13. When prompted, idle the engine and select Next.
14. Turn on the high beam headlights and ventilation blower and select Next. The alternator output is tested.
15. When prompted, rev and hold the engine to between 2000 and 3000 rpm. The alternator output is tested.
16. When prompted, turn off all loads and idle the engine.
17. Select Next to display the test results.
IMPORTANT: Do not disconnect tester clamps from the battery until test data has been transmitted to BMIS and results displayed on the tool screen. An error message is displayed if the CPX-930 is unable to transmit the data.
System Test Results
Icons are color-coded to indicate status.
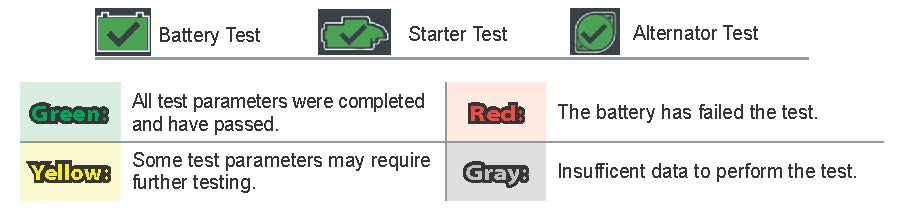
The Test Results – Summary screen is displayed following a System Test. Select the Battery, Cranking, or Charging Test to view detailed test results for each part of the test.

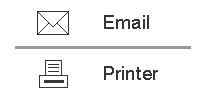
Select Send Results displayed at the bottom of the tester screen to send the test results to the built-in printer or via email. Select Done to return to the Main Menu.
Test Results – Battery

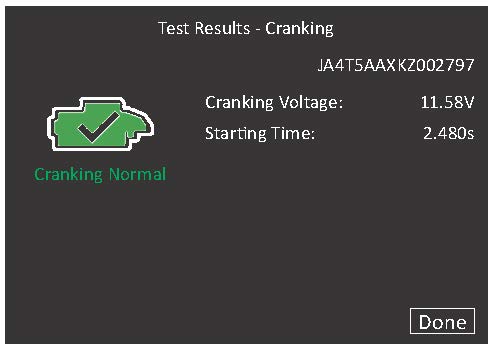
Test Results – Cranking
Test Results – Charging

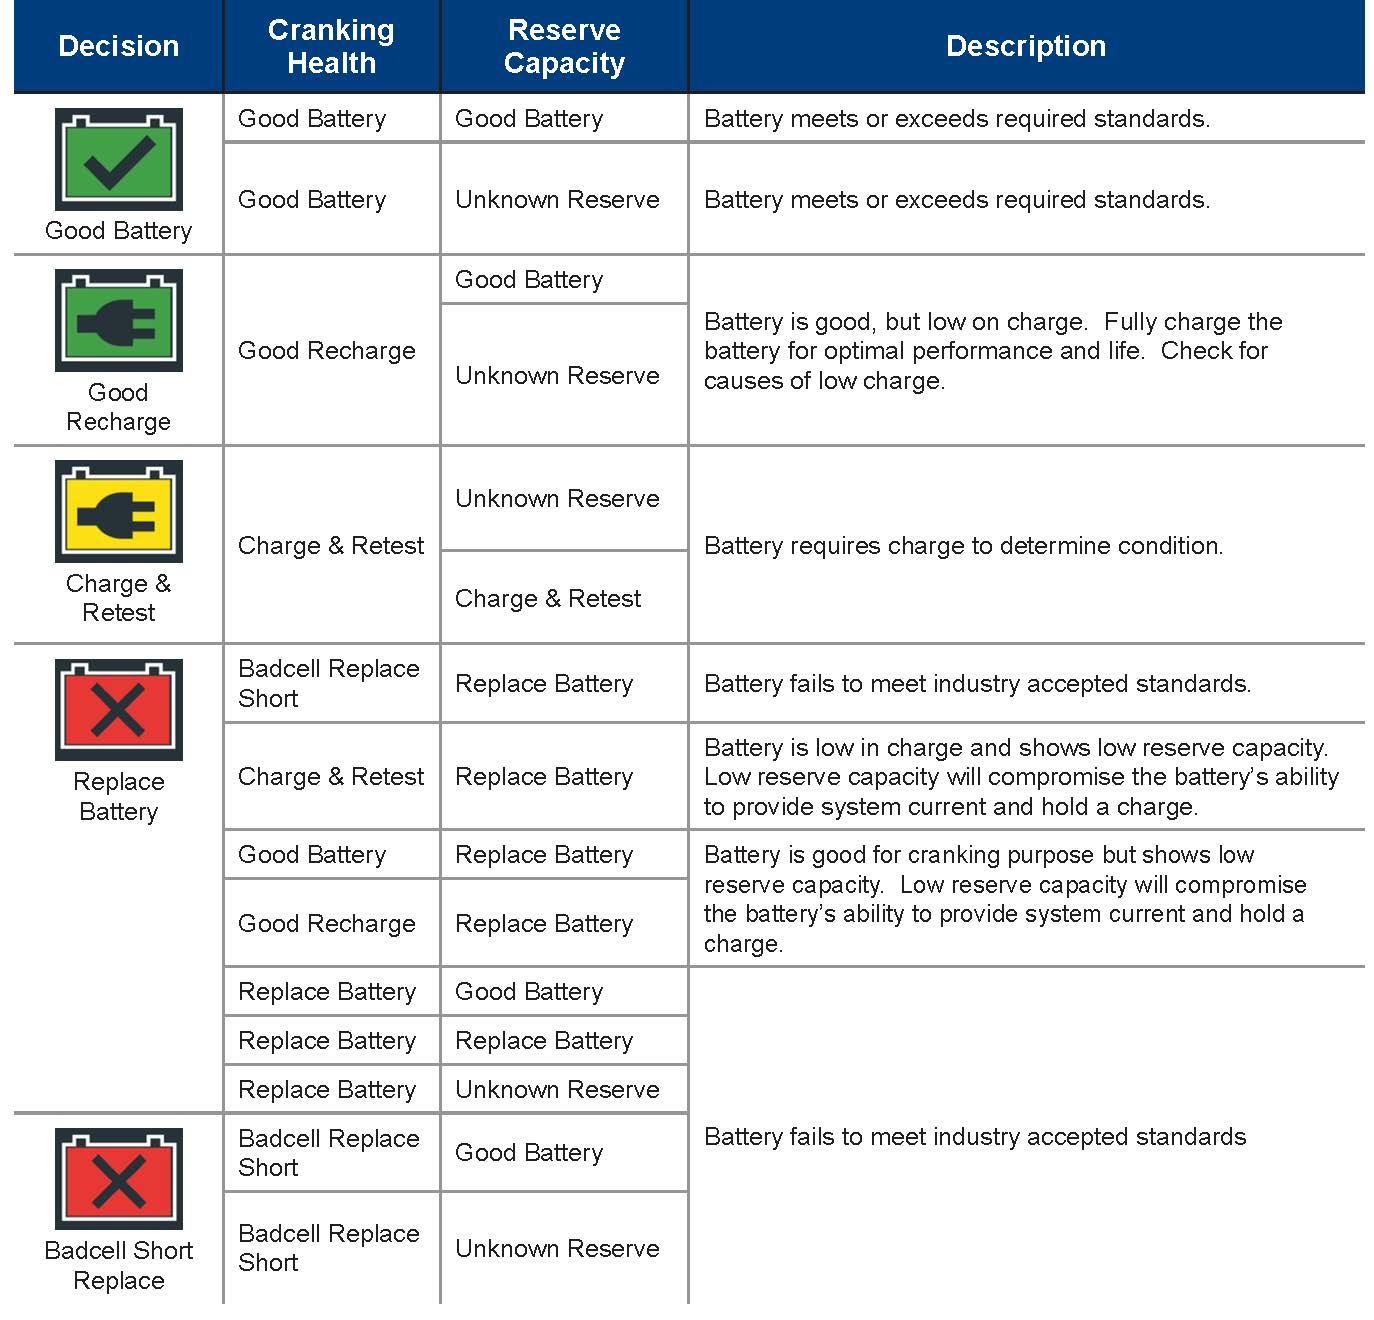
Battery Test Parameter Descriptions
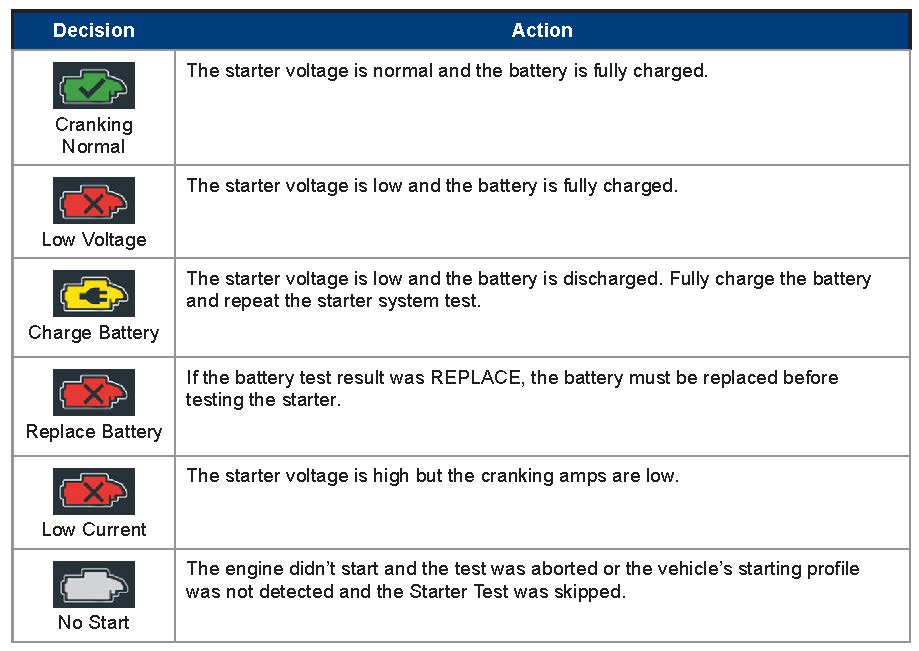
Starter Test Parameter Descriptions
Alternator Test Parameter Descriptions
